Settings
Search
Appearance
Theme Mode
About
Jekyll v3.10.0
Environment Production
Last Build
2026-05-24 21:20 UTC
Current Environment Production
Build Time May 24, 21:20
Jekyll v3.10.0
Build env (JEKYLL_ENV) production
Page Location
Page Info
Layout default
Collection quickstart
Path _quickstart/github-setup.md
URL /quickstart/github-setup/
Date 2026-05-24
Theme Skin
SVG Backgrounds
Layer Opacity
0.6
0.04
0.08

🐙 GitHub Setup & Deployment

Master GitHub integration for the Zer0-Mistakes theme, from development to production deployment. This guide covers the complete workflow: forking, development, collaboration, and automated deployment to GitHub Pages.

🎯 Overview

GitHub integration with Zer0-Mistakes provides:

  • Seamless Development: Fork, clone, and develop locally with Docker
  • Automated Deployment: Push to deploy with GitHub Pages
  • Collaboration: Team-friendly workflows and contribution guidelines
  • Version Control: Professional Git workflows with branching strategies
  • CI/CD Integration: Automated testing and deployment pipelines

🛠️ Prerequisites

Before starting GitHub integration, ensure you have completed:

  1. Machine Setup - Docker Desktop, Git, and GitHub CLI installed
  2. Jekyll Setup - Development environment running
  3. GitHub account - Create one if needed

📦 Development Tools Installation

Package Manager Verification

First, confirm your package manager is available:

macOS:

brew --version

Windows:

winget --version

Linux (Ubuntu/Debian):

apt --version

GitHub CLI Installation

Install GitHub CLI for seamless repository management:

macOS:

brew install gh git

Windows:

winget install Git.Git
winget install GitHub.cli

Linux (Ubuntu/Debian):

sudo apt update
sudo apt install gh git

Verify Installation

gh --version
git --version

You should see version information for both tools.

🔐 GitHub Authentication

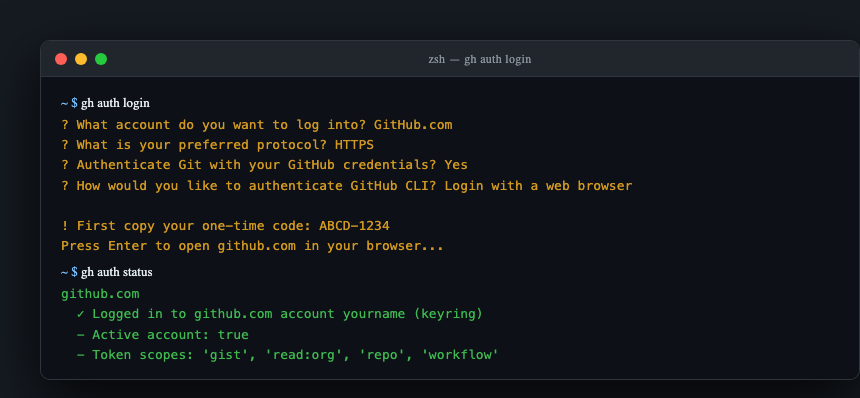
Login to GitHub CLI

Authenticate with GitHub for seamless integration:

gh auth login

Follow the interactive prompts:

  1. Select GitHub.com
  2. Choose HTTPS protocol
  3. Authenticate via web browser (recommended)
  4. Complete authentication in your browser

Configure Git Identity

Set up your Git identity for commits:

# Use your GitHub username and no-reply email
git config --global user.name "YourGitHubUsername"
git config --global user.email "yourusername@users.noreply.github.com"

# Verify configuration
git config --global user.name
git config --global user.email

For enhanced security and convenience:

# Generate SSH key
ssh-keygen -t ed25519 -C "yourusername@users.noreply.github.com"

# Add to SSH agent
ssh-add ~/.ssh/id_ed25519

# Copy public key to clipboard
# macOS:
pbcopy < ~/.ssh/id_ed25519.pub
# Linux:
cat ~/.ssh/id_ed25519.pub | xclip -selection clipboard
# Windows:
cat ~/.ssh/id_ed25519.pub | clip

# Add to GitHub: https://github.com/settings/ssh/new

🍴 Repository Setup

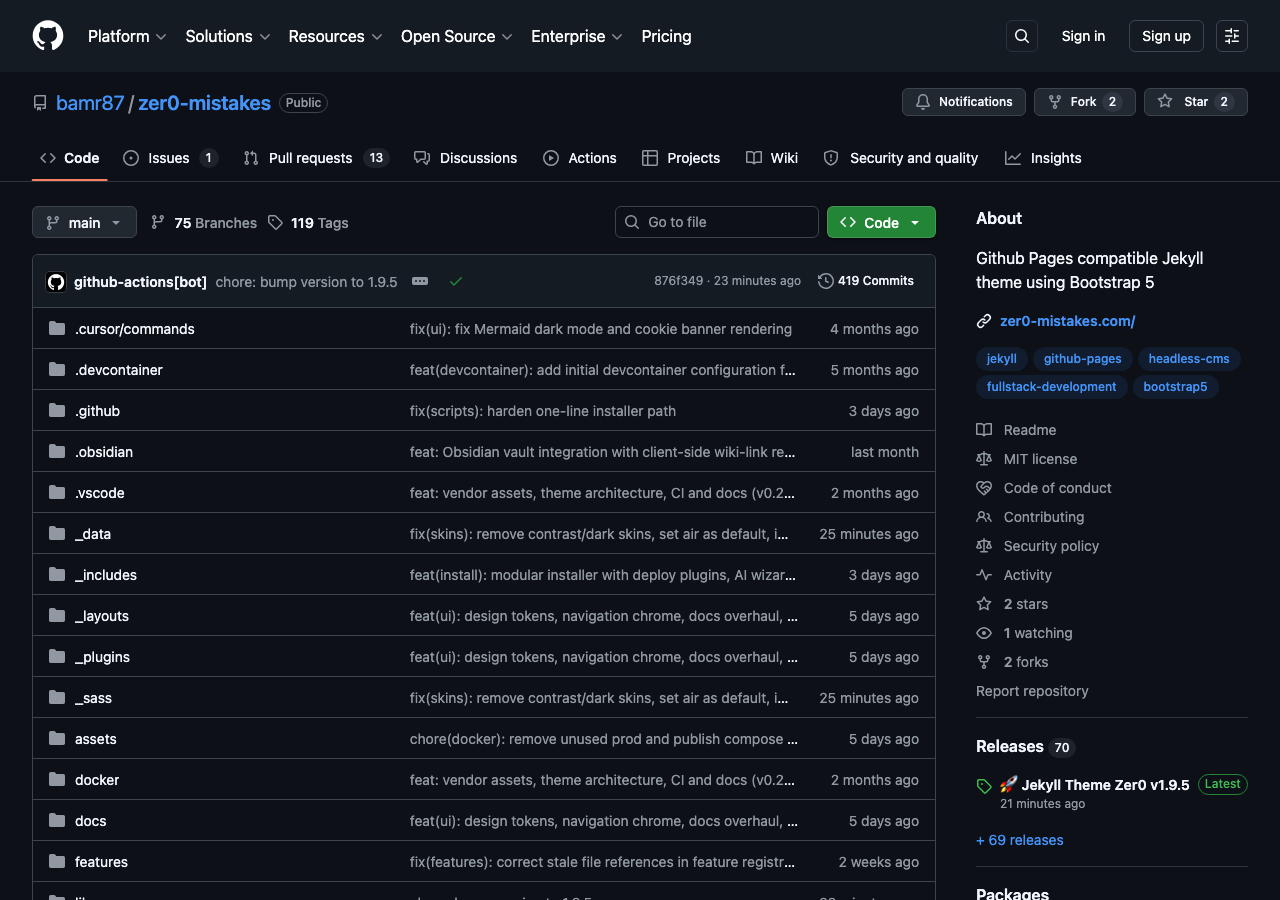
Fork the Zer0-Mistakes Theme

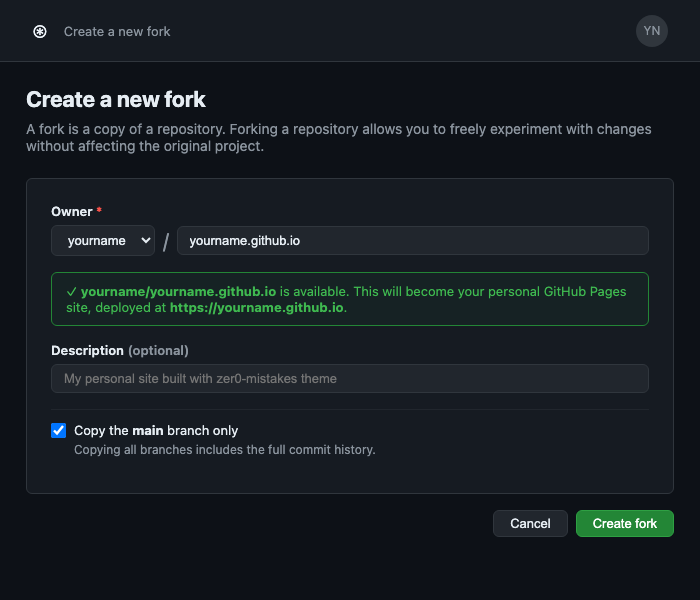
The recommended approach is to fork into a repository named <your-username>.github.io. This creates a GitHub Pages user site that deploys at the domain root — no baseurl configuration needed.

Prerequisites:

  • You do not already have a repository named <your-username>.github.io. Each GitHub account gets one free user site. If you already have one, fork into a different name and set baseurl manually (see Troubleshooting).
  • This will become your primary GitHub Pages site — the one free username.github.io domain per account.

Fork via GitHub UI:

  1. Go to bamr87/zer0-mistakesFork
  2. Set Repository name to <your-username>.github.io
  3. Click Create fork

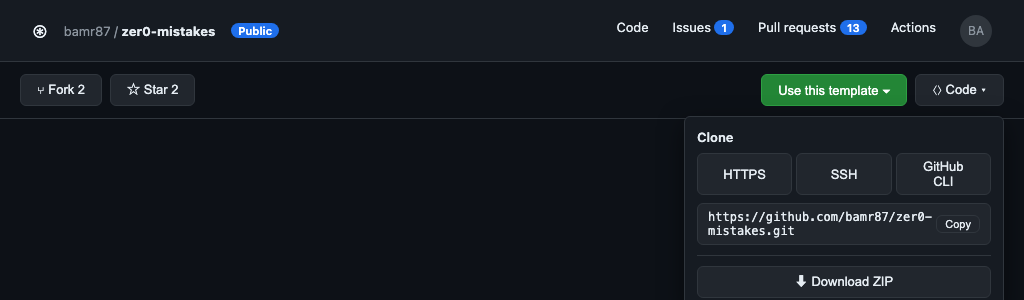
Then clone locally:

# Navigate to your development directory
cd ~
mkdir -p github
cd github

# Clone your fork
git clone https://github.com/<your-username>/<your-username>.github.io.git

# Navigate to your repository
cd <your-username>.github.io

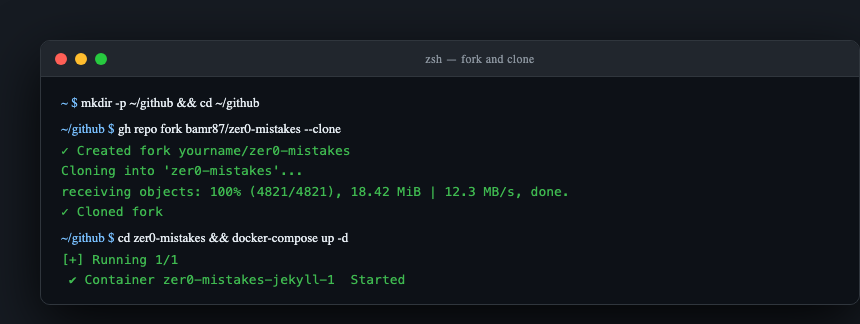
Or fork via GitHub CLI:

cd ~
mkdir -p github
cd github

# Fork and clone with a custom name
gh repo fork bamr87/zer0-mistakes --clone --remote-name origin
# Then rename via GitHub: Settings → General → Repository name → <your-username>.github.io

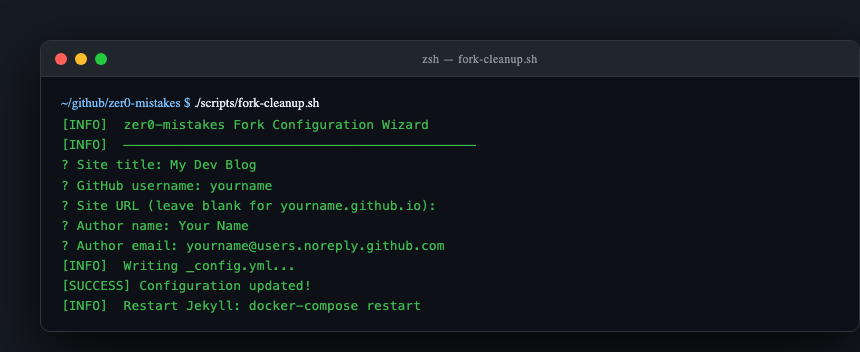
See docs/FORKING.md for the full progressive fork → configure → personalize workflow.

Repository Structure

Your forked repository includes:

zer0-mistakes/
├── _config.yml              # Production configuration
├── _config_dev.yml          # Development overrides
├── docker-compose.yml       # Docker development environment
├── Gemfile                  # Ruby dependencies
├── pages/                   # Content directory
│   ├── _posts/             # Blog posts
│   ├── _quickstart/        # Setup guides
│   └── _docs/              # Documentation
├── assets/                  # CSS, JS, images
├── _layouts/               # Jekyll templates
└── _includes/              # Reusable components

Development Environment

Start your containerized development environment:

# Start Jekyll development server
docker-compose up

# View in browser: http://localhost:4000

🚀 Development Workflow

Creating Content

New Blog Post:

# Create new post with current date
touch pages/_posts/$(date +%Y-%m-%d)-my-new-post.md

Frontmatter Template:

---
title: "Your Post Title"
description: "SEO-friendly description (150-160 characters)"
date: 2025-01-27T10:00:00.000Z
preview: /images/previews/github-setup-deployment.png
tags: [tag1, tag2, tag3]
categories: [Category, Subcategory]
layout: article
permalink: /your-post-url/
comments: true
---

Git Workflow

Feature Development:

# Create feature branch
git checkout -b feature/new-awesome-feature

# Make your changes...
# Edit files, create content, modify theme

# Stage and commit changes
git add .
git commit -m "feat: add awesome new feature

- Implement new feature functionality
- Update documentation
- Add tests for new feature"

# Push to your fork
git push origin feature/new-awesome-feature

# Create pull request
gh pr create --title "Add awesome new feature" --body "Description of changes"

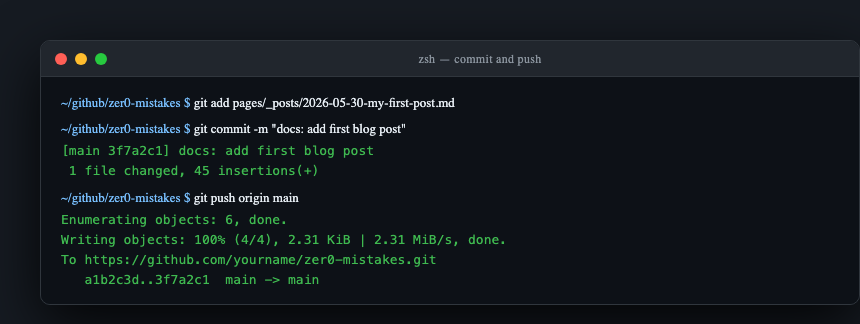
Quick Content Updates:

# For simple content updates
git add pages/_posts/your-new-post.md
git commit -m "docs: add new blog post about Docker development"
git push origin main

🌐 GitHub Pages Deployment

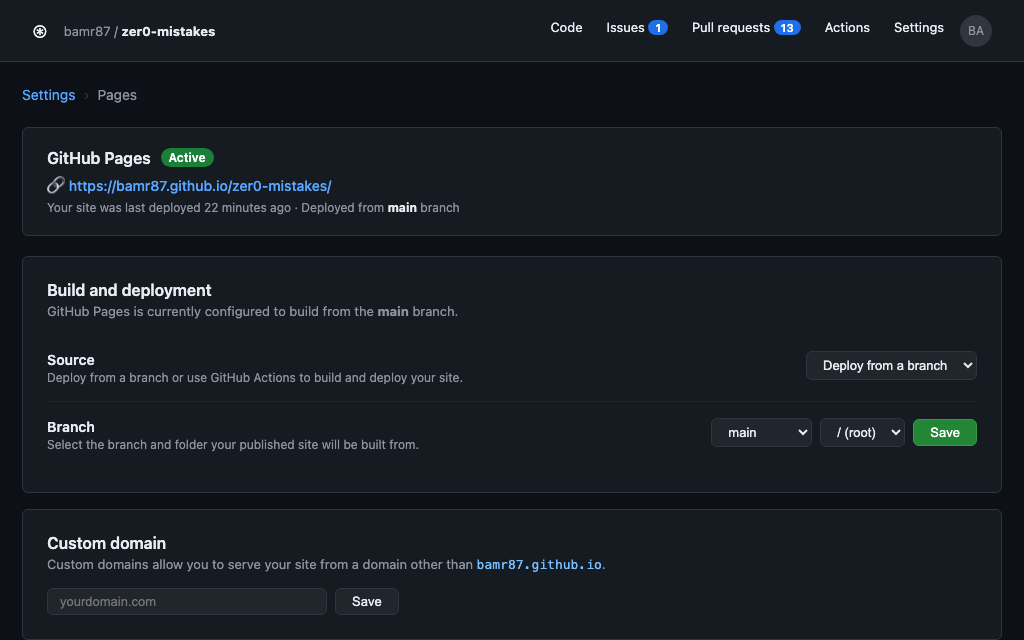
Enable GitHub Pages

  1. Navigate to your repository on GitHub
  2. Go to SettingsPages
  3. Configure source:
    • Source: Deploy from a branch
    • Branch: main (or gh-pages)
    • Folder: / (root)

Automatic Deployment

GitHub Pages automatically deploys when you push to your main branch:

# Deploy to production
git checkout main
git merge feature/your-feature
git push origin main

# If you forked into <username>.github.io, your site deploys to:
# https://<your-username>.github.io
#
# If you used a different repo name, your site deploys to:
# https://<your-username>.github.io/<repo-name>
# (and you'll need to set baseurl: "/<repo-name>" in _config.yml)

Recommended: Fork into <your-username>.github.io to avoid baseurl issues entirely. See docs/FORKING.md for the complete guide.

Custom Domain (Optional)

For custom domains:

  1. Create CNAME file in repository root:

    your-domain.com
    
  2. Configure DNS records with your domain provider:
    • Type: CNAME
    • Name: www (or @)
    • Value: yourusername.github.io
  3. Enable HTTPS in repository settings

🤝 Collaboration

Contributing to Upstream

To contribute back to the main Zer0-Mistakes repository:

# Add upstream remote
git remote add upstream https://github.com/bamr87/zer0-mistakes.git

# Sync with upstream
git fetch upstream
git checkout main
git merge upstream/main
git push origin main

# Create contribution branch
git checkout -b contrib/your-improvement

# Make changes and submit PR
git push origin contrib/your-improvement
gh pr create --repo bamr87/zer0-mistakes

Team Development

For team collaboration:

  1. Invite collaborators to your repository
  2. Use branch protection for main branch
  3. Require pull request reviews before merging
  4. Enable GitHub Actions for automated testing

🔧 Advanced Configuration

Environment Variables

For sensitive configuration, use GitHub repository secrets:

  1. Go to SettingsSecrets and variablesActions
  2. Add secrets like:
    • GOOGLE_ANALYTICS_ID
    • DISQUS_SHORTNAME
    • CONTACT_EMAIL

🔍 Troubleshooting

Common Issues

Permission Denied:

# Check SSH key setup
ssh -T git@github.com

# Re-authenticate if needed
gh auth login

Deployment Failures:

# Check GitHub Pages build status
gh api repos/:owner/:repo/pages/builds

# View detailed logs in repository Actions tab

Local Development Issues:

# Restart Docker environment
docker-compose down && docker-compose up --build

# Clear Jekyll cache
docker-compose exec jekyll jekyll clean

Getting Help

🎉 Next Steps

After completing GitHub setup:

  1. Personalize your site - Configure site identity, branding, and analytics
  2. Create your first post using the provided templates
  3. Set up analytics and monitoring tools
  4. Explore the documentation for advanced customization

🏆 Congratulations! You now have a complete GitHub-integrated Jekyll development environment with automated deployment. Continue to Personalization to customize your site!


🏆 Congratulations! You now have a complete GitHub-integrated Jekyll development environment with automated deployment. Start creating amazing content!